Classical Ceiling Shapes
Create the Feeling of Height Without Raising the Whole Ceiling
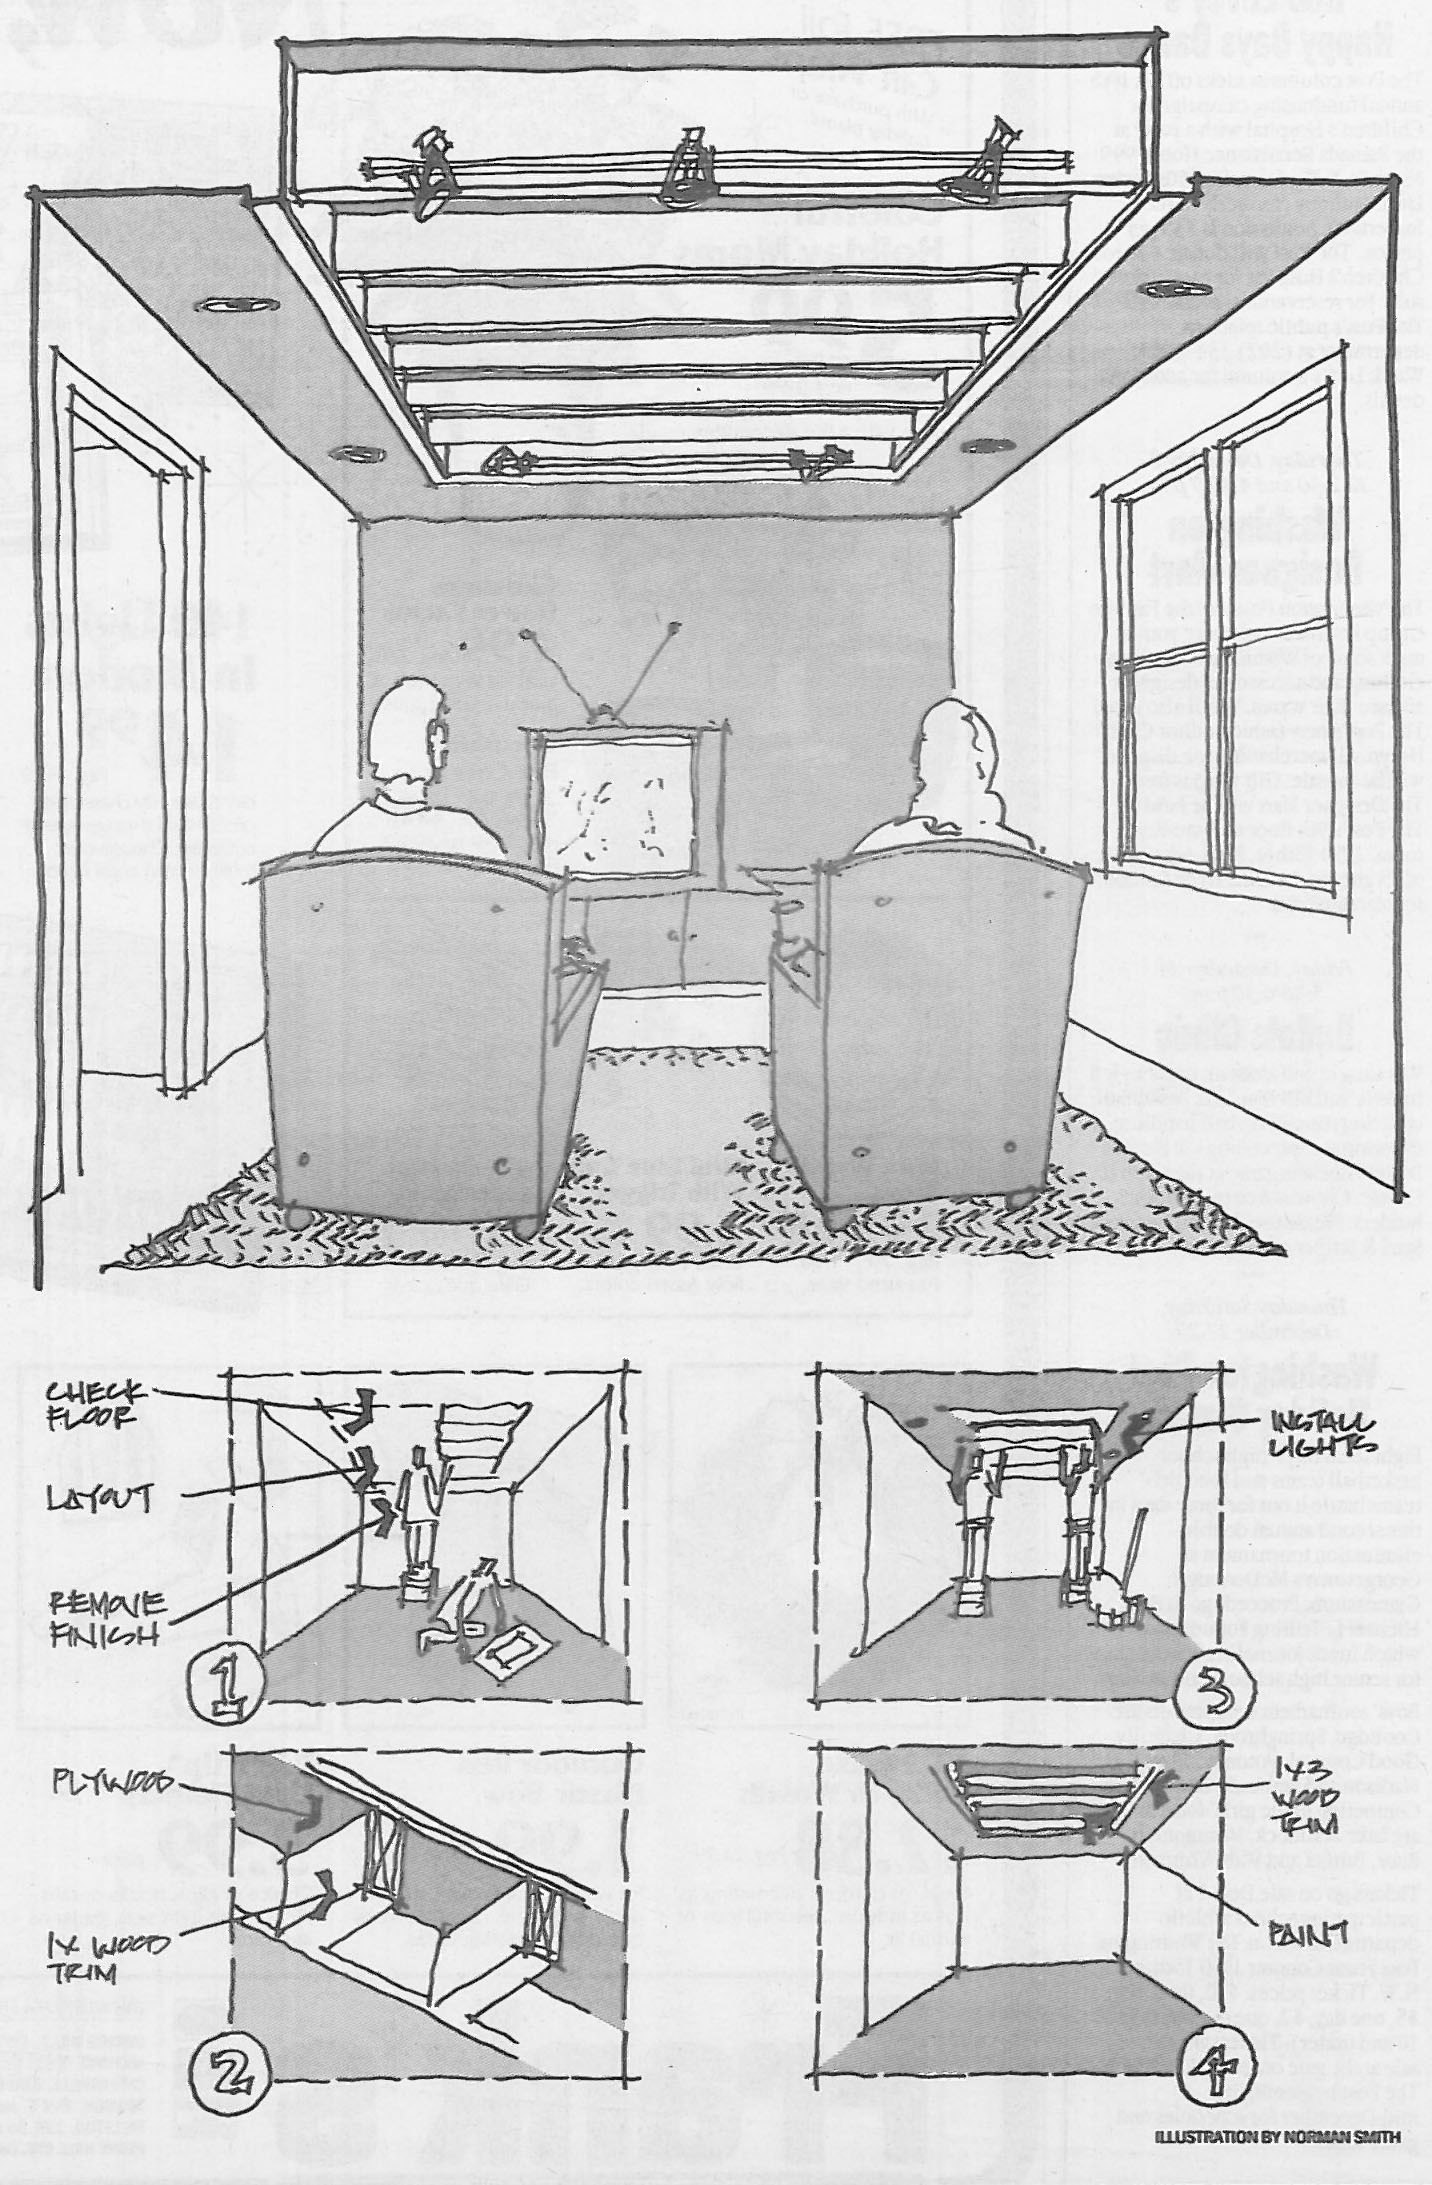
One of the devices architects use to manipulate the feeling of space without changing its dimensions is a coffer in the ceiling. This makes the room feel taller and more expansive without actually increasing its height.
Traditional coffering is the decorating of a ceiling with recessed square, rectangular or polygonal shapes that often are combined with trim and molding. This technique has its origins in classical design and first became widely popular in the Georgian period of design during the 18th and 19th centuries. Although coffers usually are made by applying wood or plaster trim, they can also be made by removing existing surfaces.
The design shown here is for a small den with a typical eight-foot ceiling. The coffers are constructed by removing the old finished ceiling in a portion of the room and exposing and refinishing the joist spaces above. In addition to making the room seem taller, the series of recesses becomes a focal point in the room and gives an opportunity for new lighting effects.
The project involves four basic steps with the exception of the electrical work, can be done by homeowners with some carpentry and remodeling experience. Before removing any ceiling wallboard or plaster, mark on the ceiling the area to be removed; in this design, the exposed ceiling is 8 feet wide and 10 feet long. Next, make small inspection holes to look for any concealed electrical or plumbing lines. If you find any lines, call in a licensed professional to move them. Once this has been done, any remaining wallboard or plaster can be carefully removed with handsaw and utility knife.
Since most joists are rough framing lumber, they need to be covered with 3/4-inch-thick trim lumber for a finished appearance. The open spaces between joists along either side are then filled in, blocked, with 2-by lumber and finished with the 3/4-inch trim. If the revealed flooring above is in good shape, it can be left exposed and painted. Otherwise, small sheets of 3/16-inch-thick finished plywood can be fitted in between the joists to cover the flooring.
A licensed electrician should be brought in to install lights and run wiring for them. Here, two lengths of track lights are installed at the bottom of the joists near each end of the exposed ceiling. Three track head lights on each track can be adjusted up toward the ceiling or down toward the floor. Recessed downlights are installed around the perimeter of the room, where the ceiling has been left in place.
The last step is to finish the ceiling opening with 1-by-3 wood trim and spackle and paint the various surfaces. Choose colors that provide a strong contrast; and, on the exposed surfaced of the floor above, use a dark color such as forest green or navy blue that will recede and create the impression of more height.
Norman Smith practices in the Washington area. For help with your design problems, send snapshots and dimensions to him in care of info@taurusdev.com